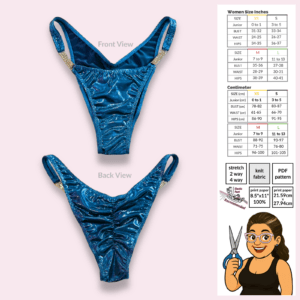
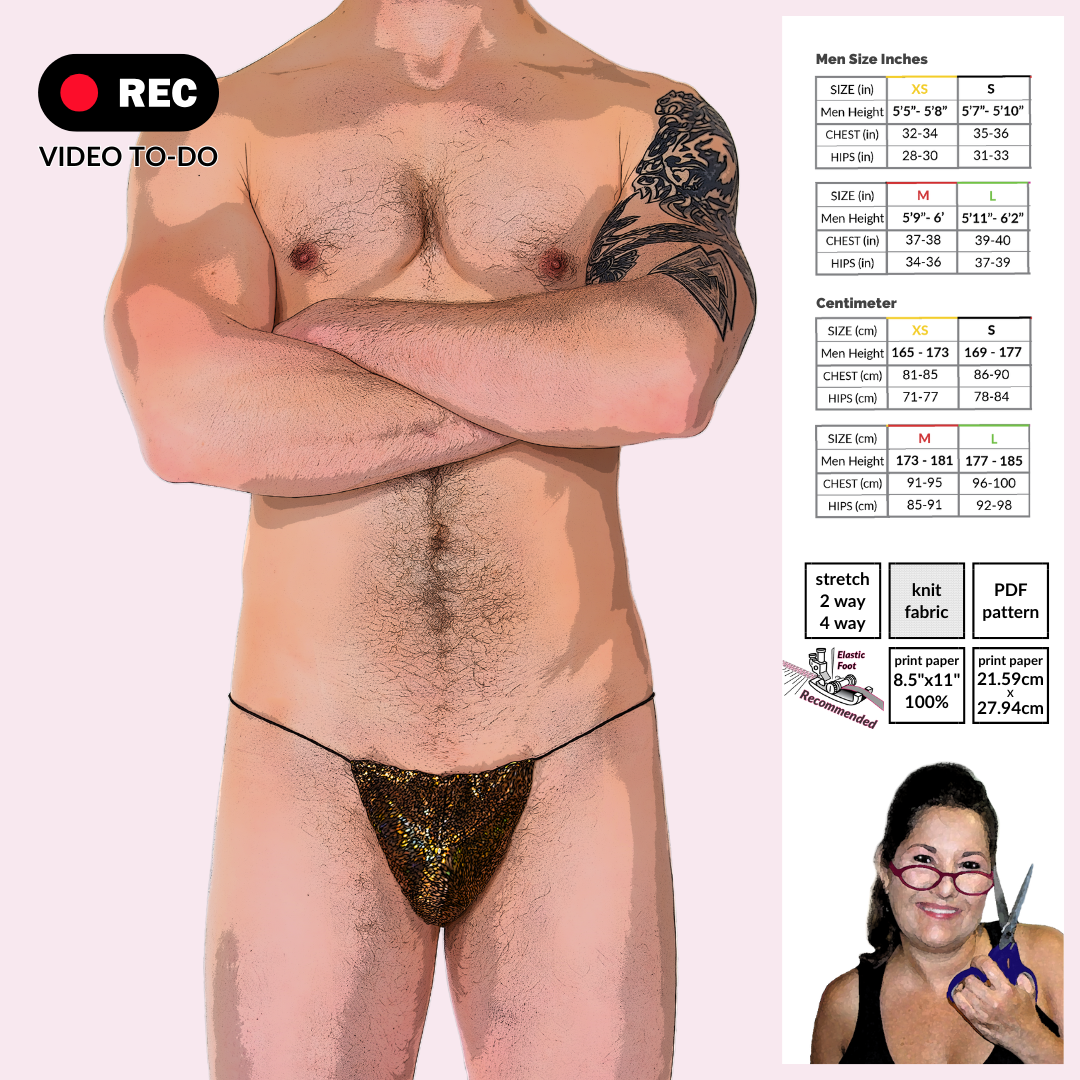
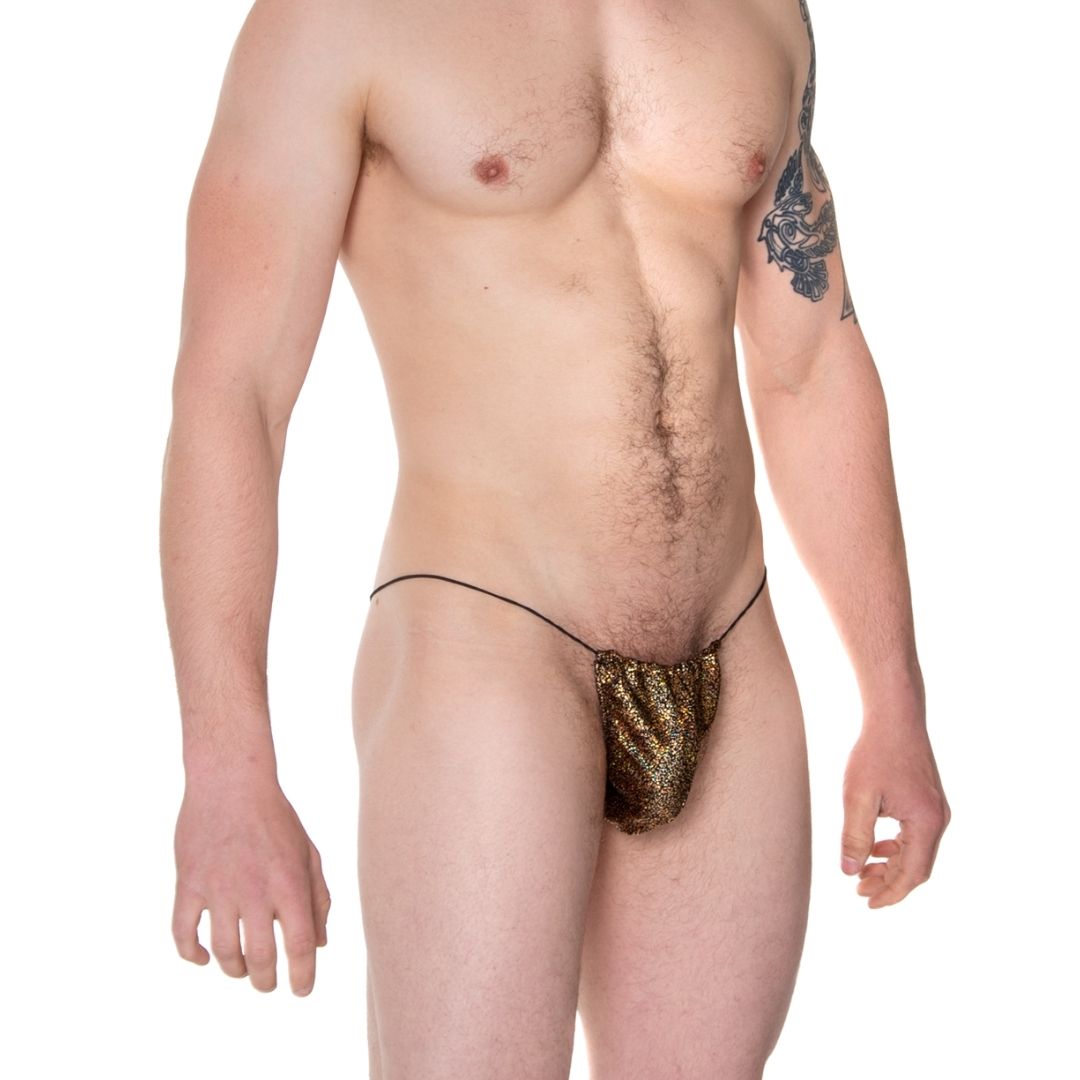
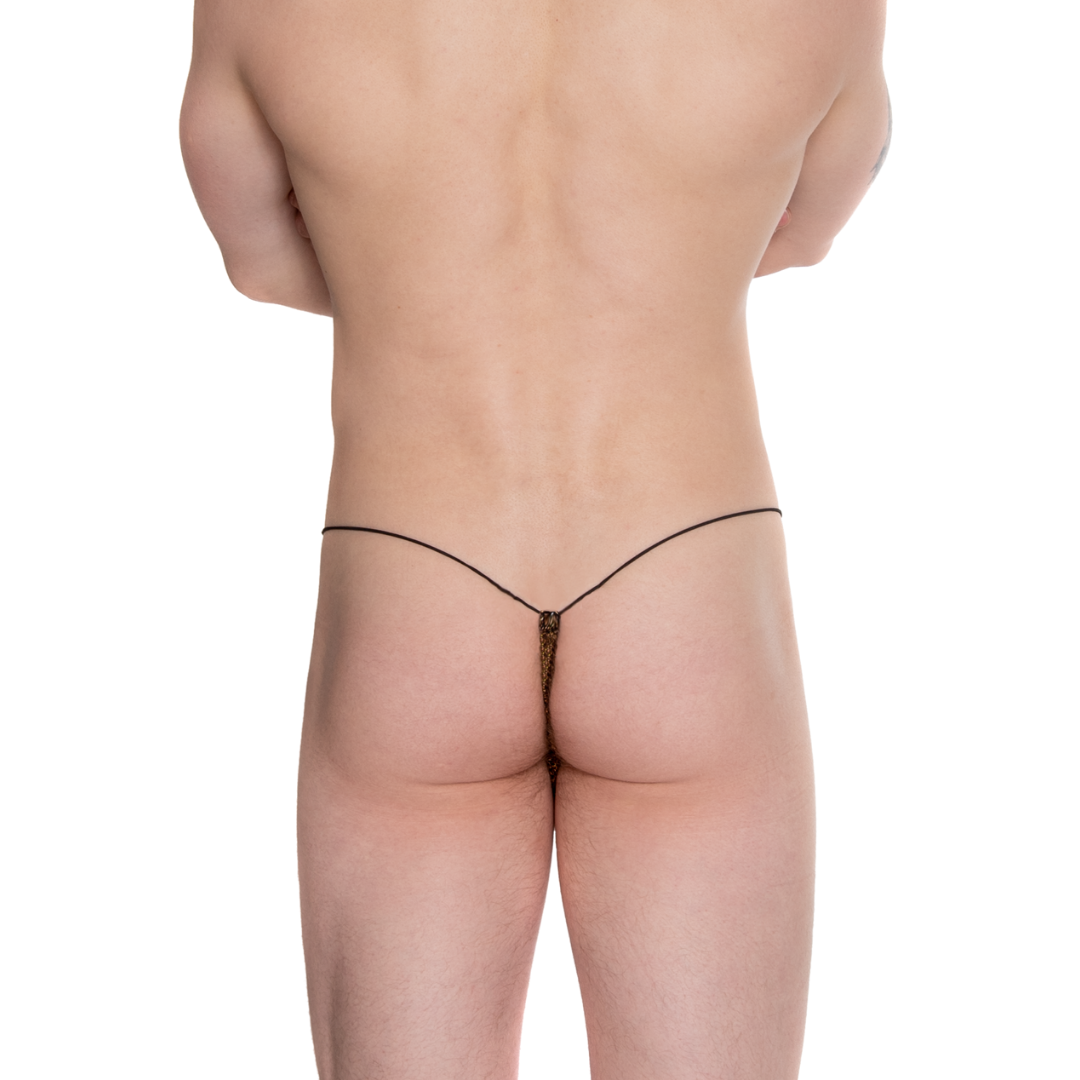
The Manly Cord Thong Sewing Pattern is a low-rise men’s thong with minimal front and thong back coverage, finished with a cord waistband for a bold, skimpy fit. Designed for confident beginners, this DIY men’s thong pattern sews easily on a home machine with an elastic foot, but delivers pro-level results with a serger.
Customize your look with lightweight stretch fabrics for everyday comfort or thicker novelty fabrics like faux fur for daring exoticwear. I recommend using a 2 mm stretch cord for durability, though a 1 mm cord also works for a lighter fit.
This men’s thong sewing pattern includes five sizes (XS–L) and is perfect for sewing festival wear, cosplay, exotic dancewear, or just to create your own custom underwear style.
💡 Don’t miss the tutorials on my YouTube channel for sewing tips and stretch fabric tricks.
- Includes sizes XS-L
- One coverage option, Mans Pouch with no back thong string
- Formatted to print on US letter (8.5 x 11)
- Test square in US 2 x 2 inch and Metric unit 5.08 cm
- Pattern is color coded per size so you can make YOUR custom size
What You Will Need
Pattern Pieces
- Piece 1: Thong Body (front & back)
- Piece 2: Cord Elastic (waistband length by size)
You Will Need
- ¼ yard stretch fabric (2-way or 4-way)
- 1 yard ¼” elastic
- 2 mm stretch cord (Mandala Crafts or Dritz recommended)
- Matching thread
Pattern Assembly
- With right sides together, serge center seams of front and back (¼”).
- Serge top edge of pouch for cord casing guide.
- Sew ¼” elastic to both side edges, gently stretching as you sew.
- Fold elastic inside and hem with a zigzag or coverstitch.
- Fold and hem top front edge for cord casing.
- Fold and hem top back edge for cord casing.
- Thread cord (Piece 2) through both casings.
- Knot ends together and hide knot inside back casing.
Follow Along Quickie Tutorial coming soon