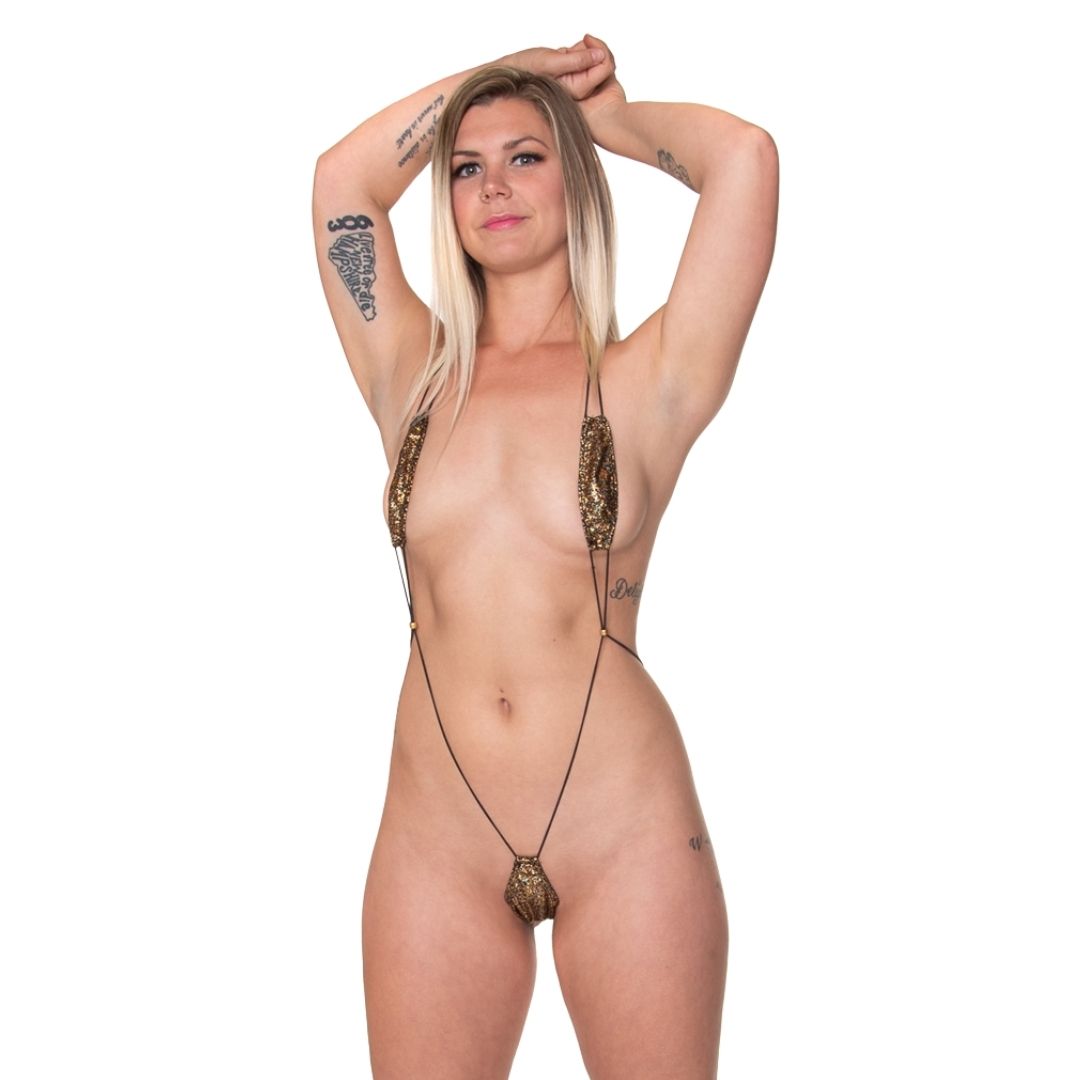
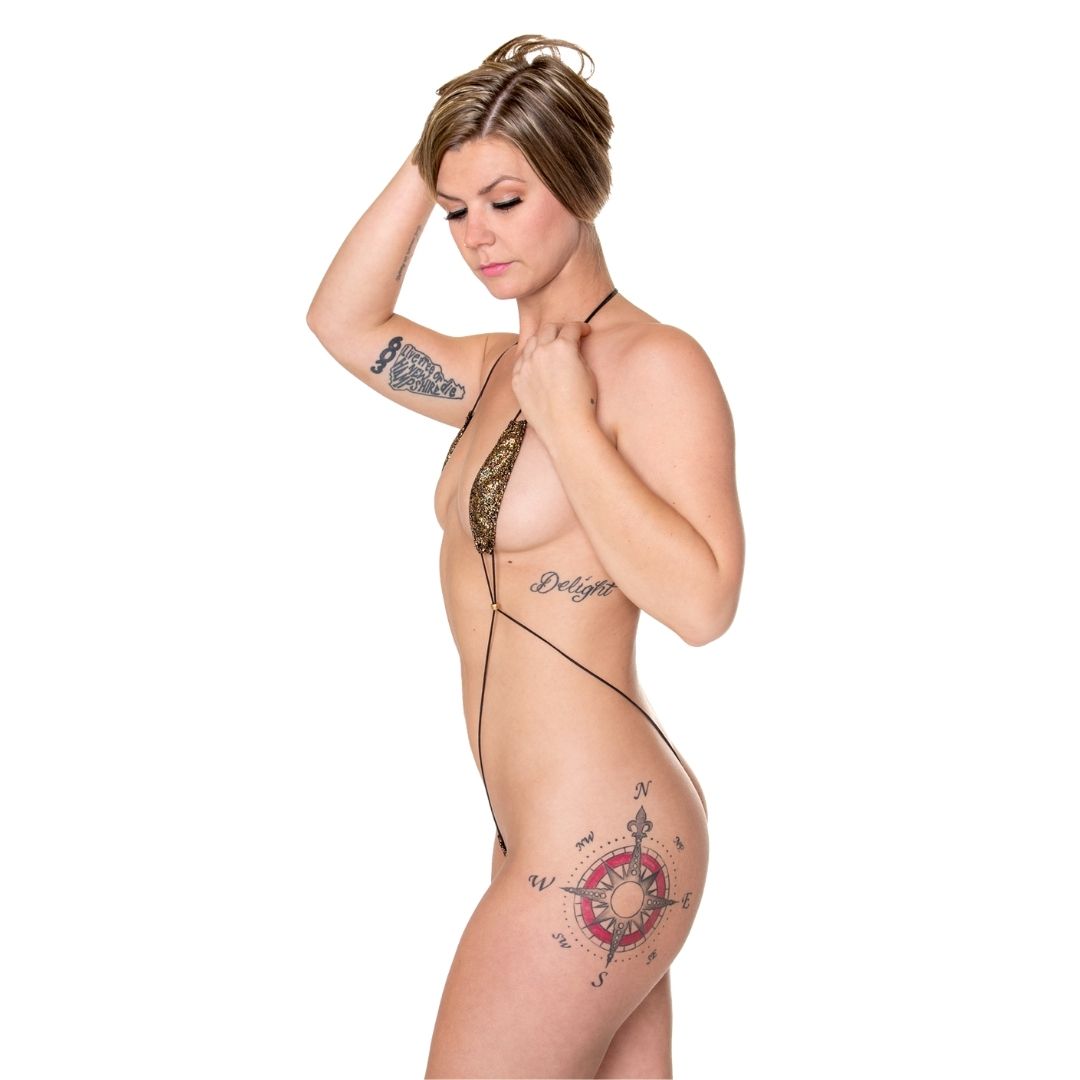


This Monokini sewing pattern is too hot to handle! With tiny panels that barely cover the essentials, this strappy monokini bikini leaves little to the imagination. Designed as a skimpy micro teddy, this pattern features adjustable fit using sliding cords and beads. A daring sling silhouette with a thong back, ready for you to stitch into something unforgettable.
Whether you call it a monokini, bikini, micro teddy, or exotic sling, this DIY pattern lets you sew a daring, adjustable swimsuit that’s perfect for beachwear, photoshoots, exotic dance, or private occasions.
📥 Digital PDF Download – ready to print and sew right at home.
⚠️ Please note: This design is extremely minimal and intended for adventurous makers who love sewing skimpy fashion.
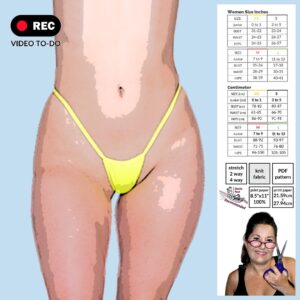
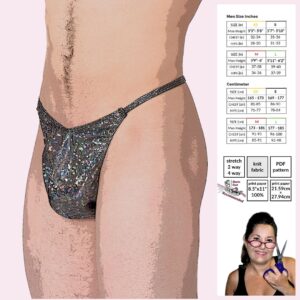
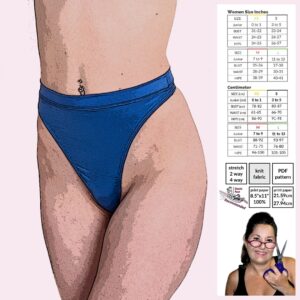
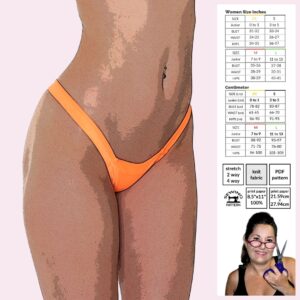
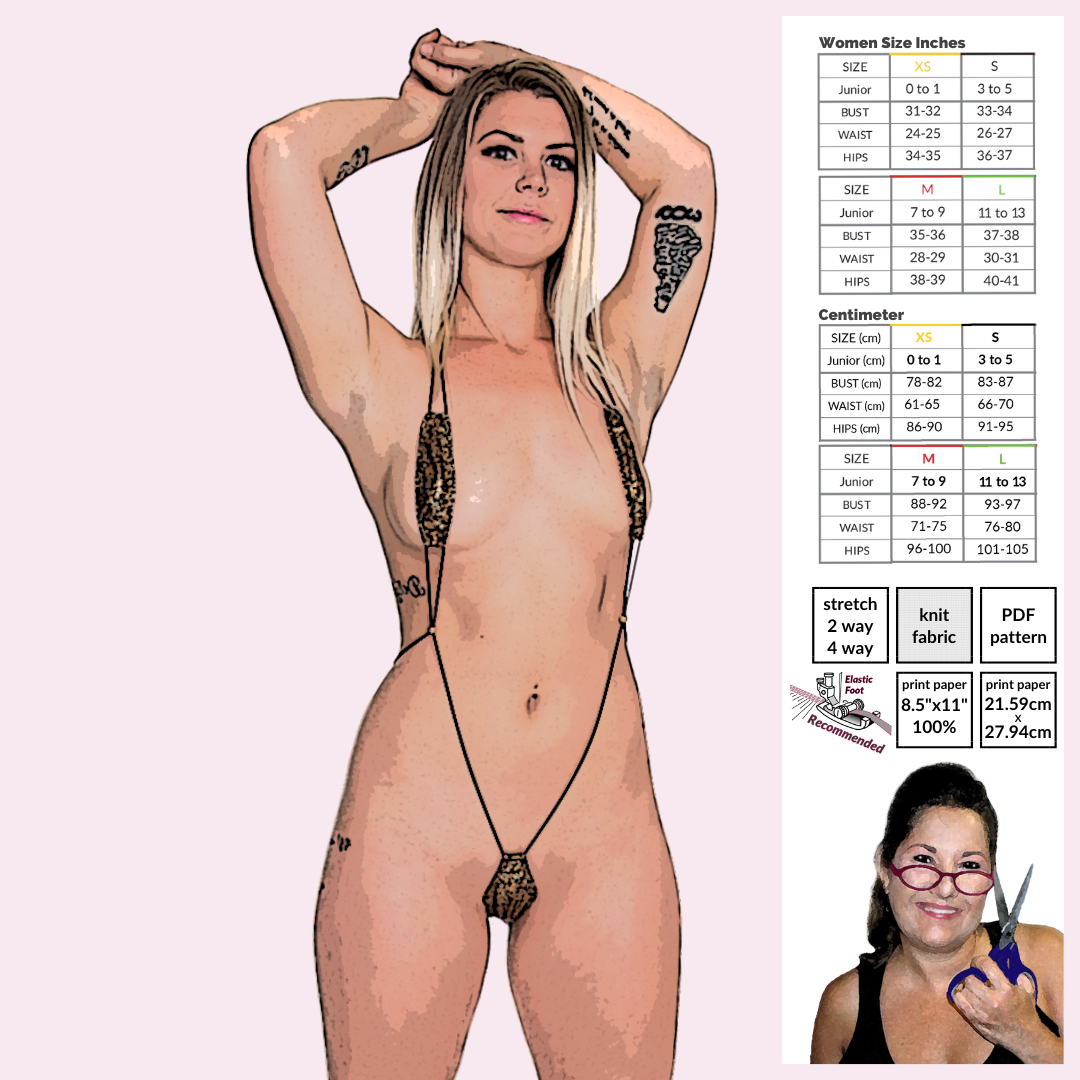
- Includes sizes XS-XL
- Minimal coverage with mini front panels
- Formatted to print on US letter (8.5 x 11)
- Test square in US 2 x 2 inch and Metric unit 5.08 cm
- Pattern is color coded per size so you can make YOUR custom size
What You Will Need
- 2-way or 4-way stretch fabric scraps (optional for lining)
- 1/4 yard center thong fabric
- 1 1/4 yards of 1/4” elastic (braided elastic recommended)
- 3 1/2 yards of 2mm stretch cord (1mm cord can be used as an alternative)
- 2 beads (ensure the cord fits through the bead holes)
- Matching thread
- Overlock machine or a regular sewing machine with zigzag stitch
- Elastic foot (recommended for ease)
Pattern Assembly
-
- (Optional) Finish both the top and bottom edges of the top pieces (1) with a serger stitch.
- Attach ¼” elastic to both sides of each top piece (1) using an elastic attachment and a stretch stitch. Do not trim the elastic flush with the fabric edge yet.
- Place the lining on the wrong side of the bottom piece (2). Secure the lining by serging across the short top edge of piece (2).
- Attach ¼” elastic to both sides of the thong bottom (2) ) using an elastic attachment using a stretch stitch, including the optional lining if used. Do not trim the elastic flush with the fabric edge yet.
- Fold the elastic and fabric of pieces (1) and (2) inward tightly to form the hem. Secure with a cover stitch, zigzag, or any suitable stretch stitch.
- Create casings by hemming all short ends of pieces (1) and (2), leaving enough space for threading cords. This means four casings for the top pieces (1) and two casings for the thong (2). Trim the excess elastic at this stage.
- Thread two cords (3) through the top casings for the neck straps. Exact lengths are not size-specific since cord elasticity and stretch can vary.
- Using the reference photos, thread one stretch cord through the torso casing. Follow the steps for cord and bead placement.
⚠️ Note: Stretch cords can vary in strength and elasticity. Adjust construction and cord lengths as needed for best fit.
Quickie Video Coming Soon –